
When it’s time to move, ensuring the safety and organization of your cherished silverware and fragile items during the transition becomes a critical consideration. To guide you through this process with finesse, we present a comprehensive step-by-step guide on how to pack silverware for moving effectively:
Why Is it Important to Pack Silverware Properly?
Properly packing silverware is of paramount importance, particularly when entrusting packing services with valuable pieces such as intricate silver cutlery and cherished kitchen utensils. The delicate nature of silverware leaves it vulnerable to tarnishing, scratching, and damage during transit or storage. By meticulously wrapping each piece, using protective materials and cushioning, the risk of abrasion and deterioration can be mitigated. This attention to packing not only preserves the aesthetic appeal and value of these items but also ensures that they remain functional and retain their splendor for generations to come. Want to know how to pack mugs for moving? Check out our blog page today!
Essential Materials
Before we go to the step-by-step process on how to pack silverware for moving, here are some essential packing materials you need:
- Small to medium-sized moving boxes
- Packing paper or bubble wrap
- Packing tape
- Zip-top plastic bags or small containers
- Marker for labeling
- Crumpled Paper
- Crushed Paper
- Rubber Bands
- Box with Tape
- Duct Tape
- Extra Tape
Step-by-Step Process on How to Pack Silverware for Moving
1. Gathering and Categorizing
Commence by meticulously sorting your silverware into distinct categories, such as forks, salad forks, knives, spoons, silverware tray, dinner forks, sterling silver pieces, cooking utensils, plastic utensils, specialized utensils, cutlery tray, fork tines, dry forks, dessert forks, silver flatware, sterling silverware, precious silverware, valuable silverware and serving utensils. This classification simplifies unpacking and organizing in your new home.
2. Wrapping Individual Pieces
Prevent potential scratching and tangling by wrapping each piece of silverware in packing paper, protective paper, layers of paper, or bubble wrap for extra protection. Securely fold the paper or wrap it around the item and affix it with tape with special care to serve as protective materials and cushioning materials.
3. Utilizing Zip-Top Bags or Containers
Enhance the protection and organization of your wrapped silverware by placing them within individual zip-top plastic bags or small containers. This step offers an additional layer of cushioning and safeguarding while maintaining impeccable order with layers of bubble wrap. Similar items can be grouped within each bag or container.
4. Layering Within the Boxes
Begin by lining the bottom of your chosen moving boxes with a layer of protective packing paper or bubble wrap, providing a cushioned foundation. Position the bags or containers holding your silverware atop this cushioning layer of crushed packing paper.
5. Careful Arrangement
Exercise precision as you arrange your silverware within the boxes with packing paper. Begin by placing weightier items at the box’s base, such as knives and serving utensils. Follow this by adding lighter items like forks and spoons on top with crumpled packing paper. This strategic arrangement ensures even weight distribution and minimizes the risk of damage.
6. Filling Empty Spaces
Fill any voids within the box to mitigate movement during transportation with additional packing paper or bubble wrap. Minimizing movement with proper techniques within the box effectively diminishes the potential for damage.
7. Labeling the Boxes
Clearly label each box as “Silverware” and denote the specific silverware category within using a black marker. This clear labeling expedites the unpacking and organization of your kitchen in your new abode.
8. Secure Box Sealing
Upon packing each box, meticulously seal them using packing tape with individual wrapping for additional protection. Confirm that all flaps are securely taped to prevent any accidental openings.
9. Ensuring Safe Transportation
When loading the boxes into your moving vehicle, position them within a secure space to prevent crushing or potential damage resulting from heavier items.
10. Prioritize Unpacking
Upon reaching your new home, prioritize unpacking the silverware boxes in the initial stages of the moving process. This foresight ensures that essential kitchen items are readily accessible as you acclimate to your new environment by our professional movers.
Adhering to this comprehensive guide guarantees the safe arrival of your treasured silverware at your new residence, ready for effortless unpacking, efficient unpacking, and seamless organization with proper packing techniques.
Conclusion
Properly packing your silverware for a move is essential to ensure these valuable and cherished items or the entire bundle arrive at your new destination in pristine condition. By following the proper steps, such as cleaning and drying each piece, wrapping them individually with soft materials, and selecting an appropriate box, you can safeguard your silverware from scratches, tarnishing, and damage during transit. Organizing the silverware in its original tray or creating compartments within the box adds an extra layer of protection. Clearly labeling the box as “Fragile” or “Silverware” and indicating the proper orientation ensures that movers handle the box carefully. Taking these precautions not only preserves the beauty of your silverware but also provides peace of mind during the moving process.
Unleash the Power of Gorilla Moves for Your Move! Elevate your moving experience with the expertise of Gorilla Moves, the ultimate moving companion. Master the technique of packing silverware effectively using our expert insights and household packing services, and ensure your move is marked by precision and care, just like your valuable utensils. Contact us now!
FAQs: How to Pack Silverware for Moving
1. How should I prepare my silverware for moving?
To prepare your silverware for moving:
- Clean each piece thoroughly to prevent tarnishing during transit.
- Separate different types of silverware (forks, knives, spoons) and organize them in groups.
- Use a soft cloth or paper to wrap each piece individually to prevent scratching.
Please place them in a sturdy box, ensuring they are well-protected and won’t move around during transportation.
2. What materials do I need to pack silverware safely?
You’ll need soft packing material such as tissue paper, bubble wrap, or soft cloth to wrap each piece of silverware individually. Additionally, gather a sturdy moving box, packing tape, and labels for proper organization. Newspaper can be used to fill gaps in the box and prevent movement. Ensure you have a marker to label the box as “Fragile” or “Silverware” for easy identification.
3. How do I prevent tarnishing during the move?
To prevent tarnishing:
- Clean your silverware thoroughly before packing.
- Ensure they are completely dry before wrapping them in soft cloth or tissue paper.
- Avoid using plastic wrap, as it can trap moisture and promote tarnishing.
Including anti-tarnish strips or silica gel packets in the box can also help absorb excess moisture and prevent tarnishing.
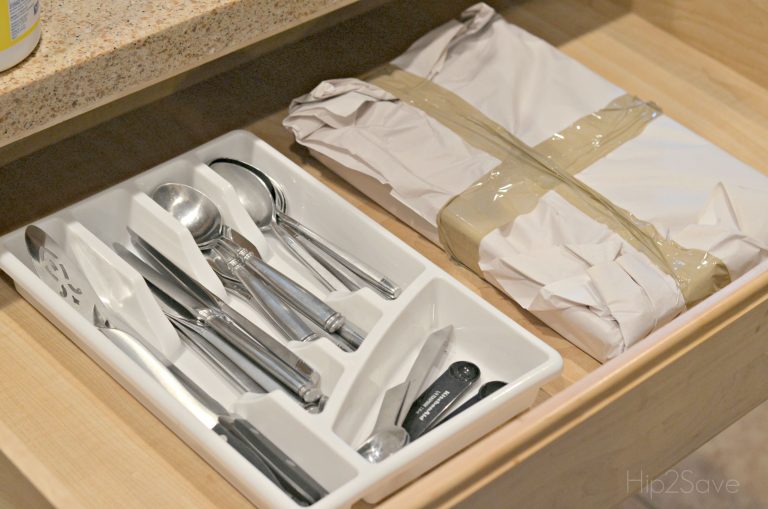
4. Should I pack silverware in its original tray or organizer?
If your silverware comes with a specific tray or organizer, it’s a good idea to use it for packing. This will help keep each piece separated and prevent scratching. If you don’t have the original tray, you can use soft cloth or padding to create compartments within the box. Make sure each piece is well-padded and won’t move around.
5. How should I label the box of packed silverware?
Clearly label the box as “Fragile” or “Silverware” using a permanent marker. This alerts movers to handle the box carefully and ensures it’s placed on top or in a position less likely to be crushed. Adding directional arrows indicating which side should be up can further prevent mishandling. Proper labeling helps you and your movers identify and treat the box accordingly.